
Professional Gray Hair Blending Round #2
Im coming up on two years of growing out my gray hair.
Gray blending is something I have done (twice now!) to help make the transition a lot more seamless and enjoyable. Here’s my before and after of round two!
If you have been around the blog for a bit, you might already know that I started embracing my natural gray hair at age 29 (thanks, genetics). After 15 years of dying my hair, I was just over it (there were actually quite a few reasons that inspired the change).
After, at first, thinking I would just cold turkey ditch-the-dye, I changed my mind and got the bottom professionally lightened. It was one of the best things that I did during this grow-out journey!! So, nearly 8 months later, I went back for another round of gray blending— not to cover any of my gray hair, but to make sure the overall tone was more cohesive.
This post shares my before and after, plus exactly what I asked my hairstylist for!
What is Gray Blending?
First things first, what even is “gray blending”??? While I am sure there is a lot of nuance in the hair styling community, here is my layman's terms definition: Gray blending is when you dye or highlight your hair to “blend” the gray hairs through different dyeing techniques. It helps to blur the demarcation line, creating a more seamless grow-out!
Related Reads:
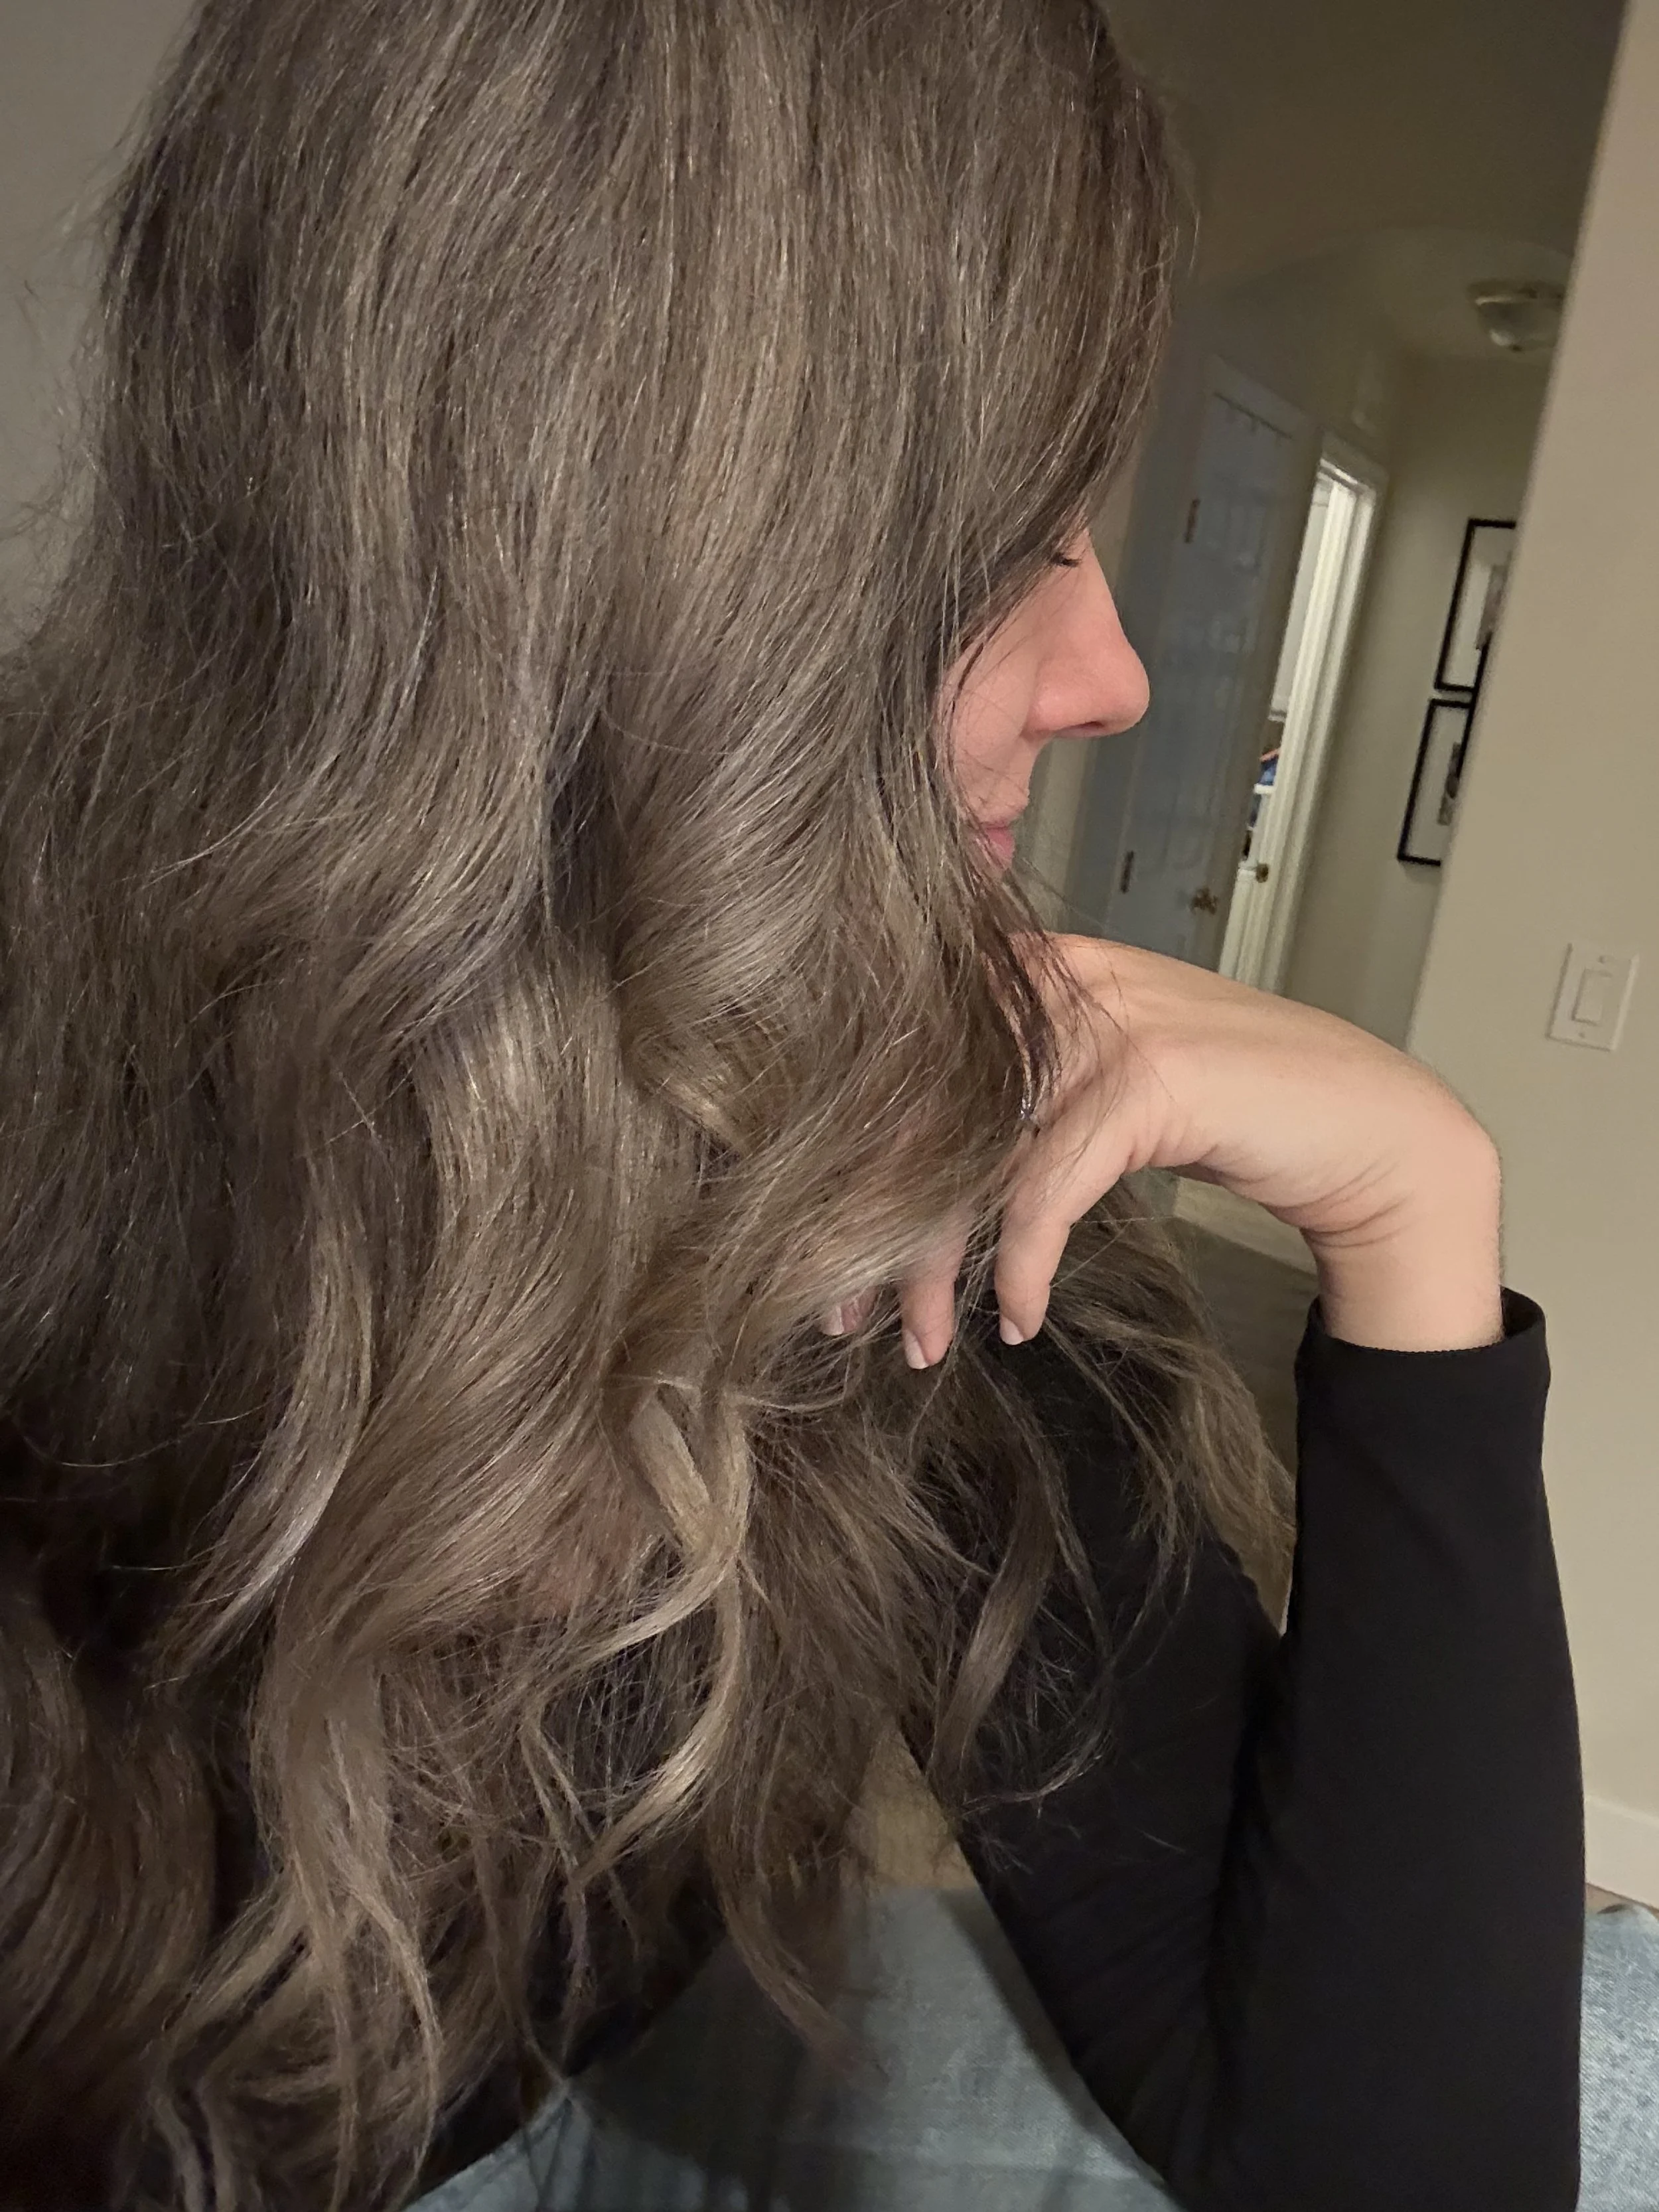
My Before Pictures
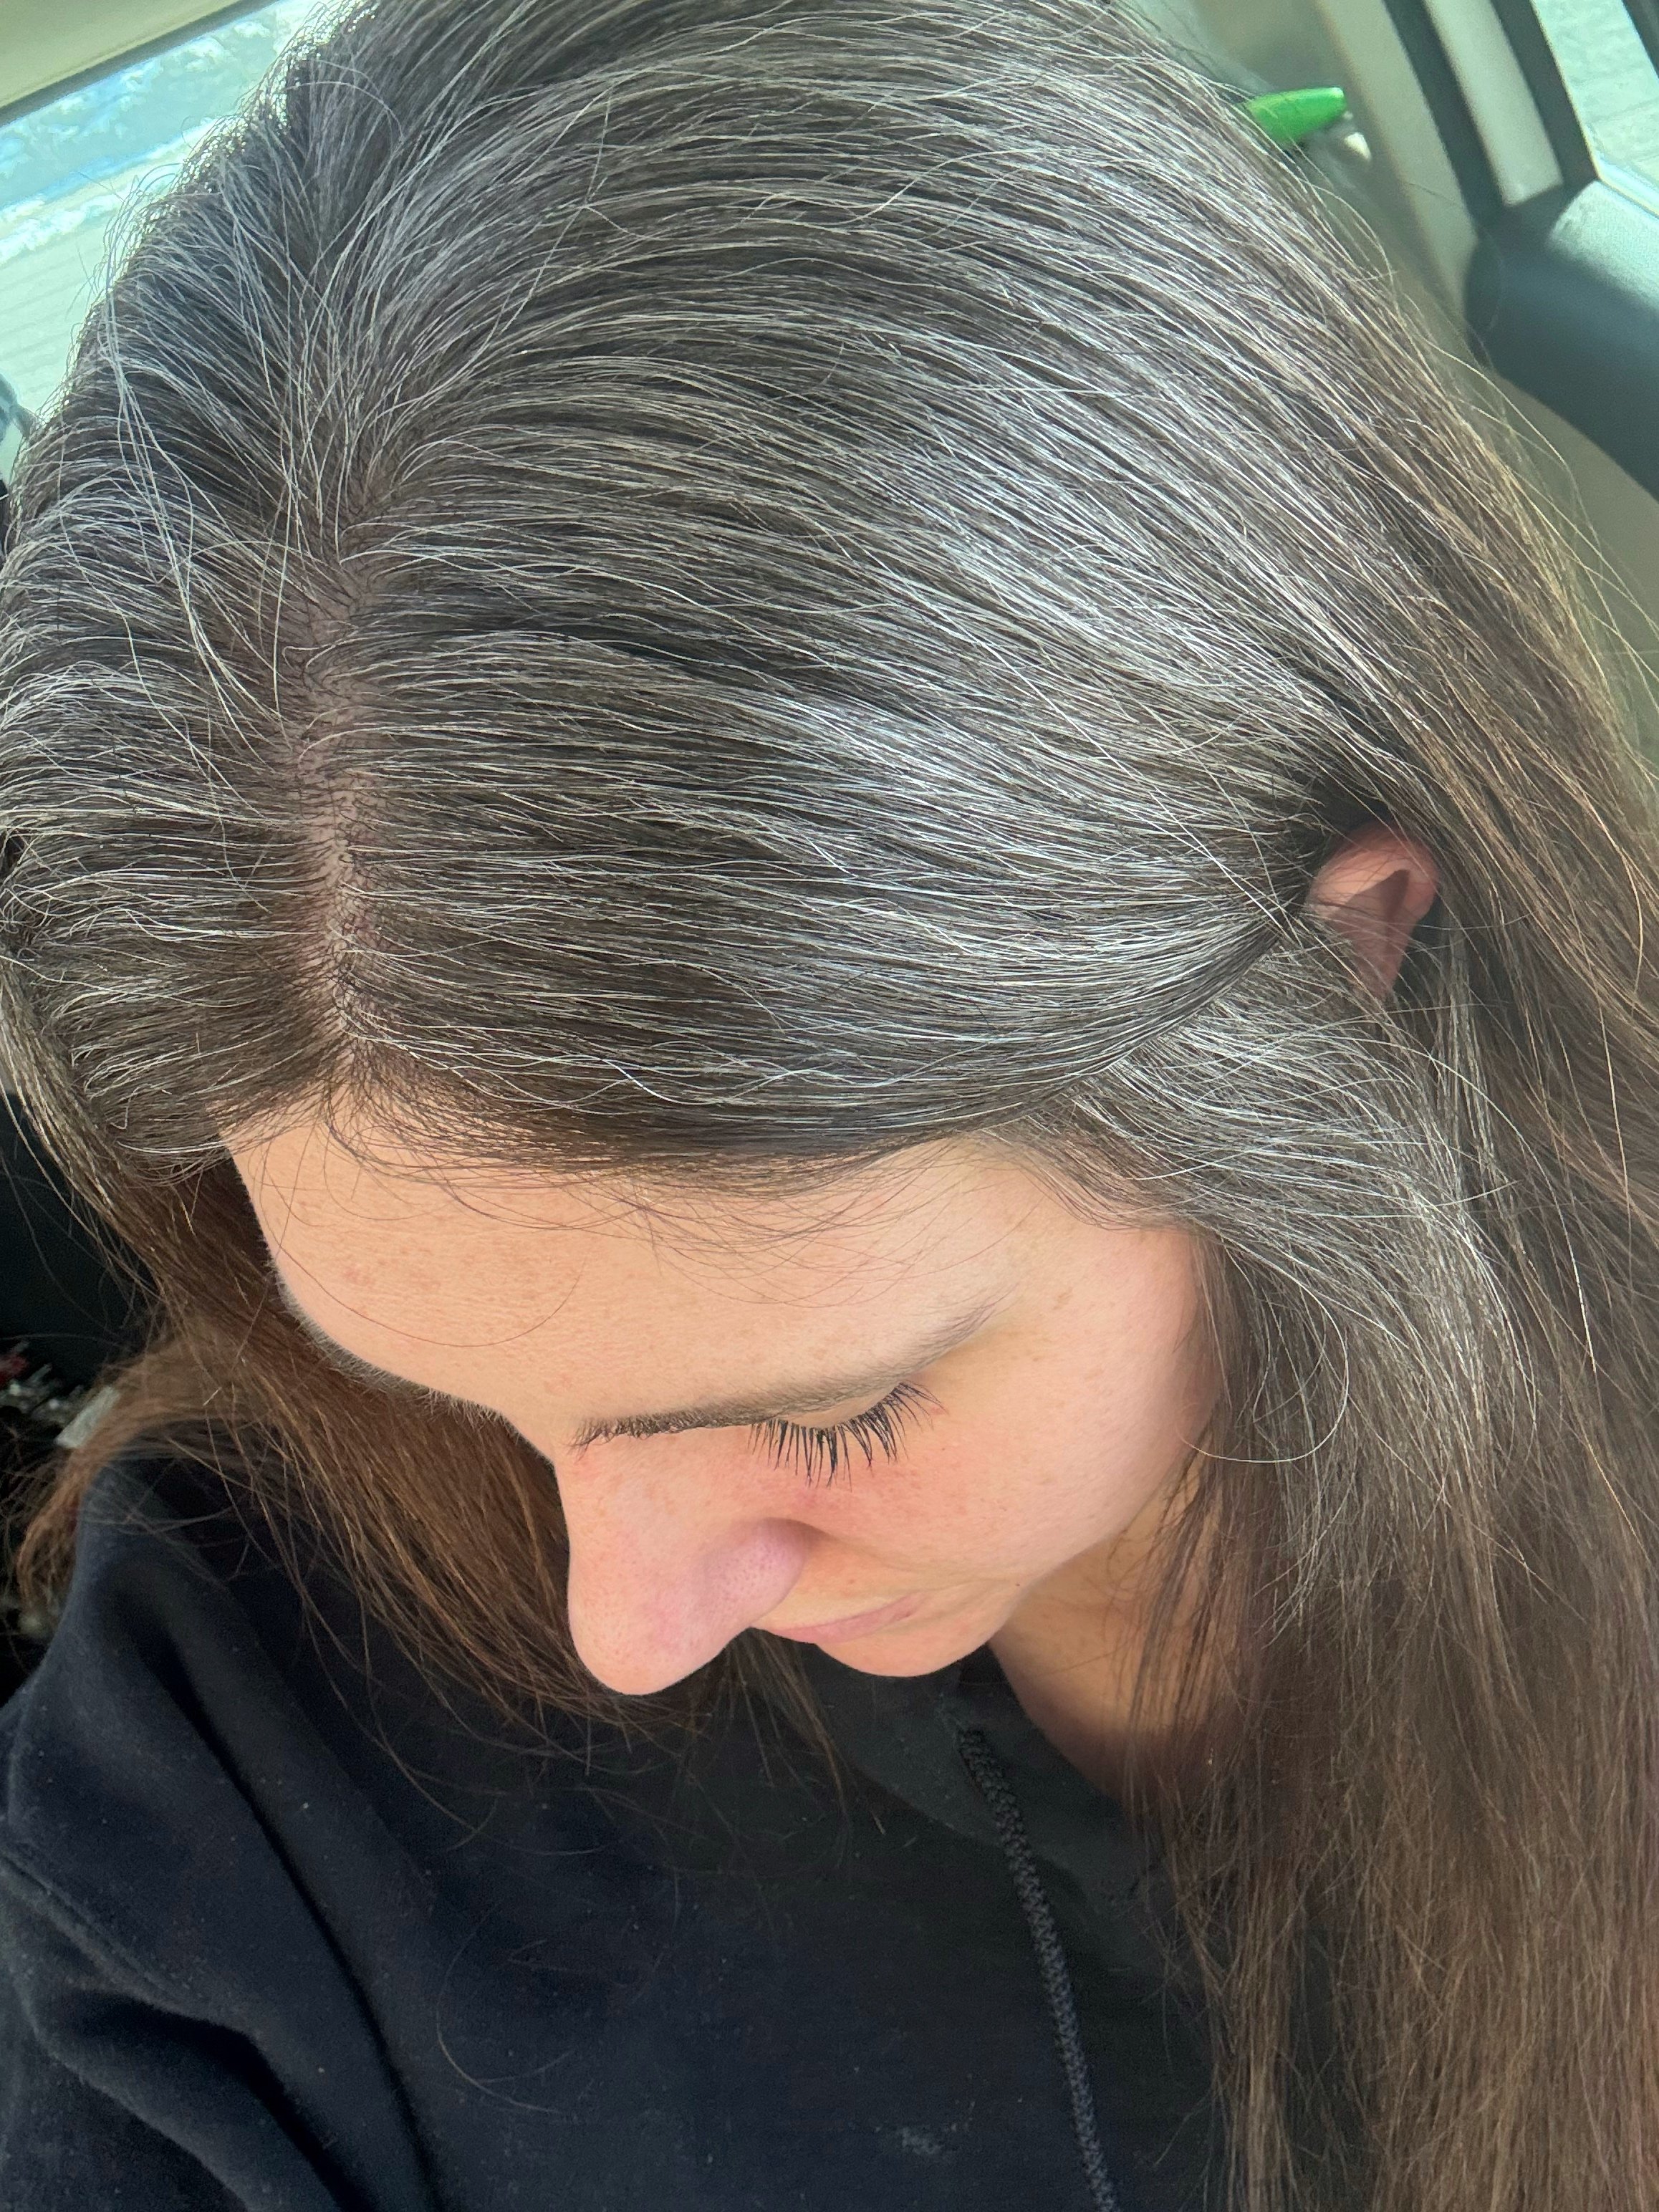
I got my hair lightened nearly 8 months ago—which is wild. At that time, my hairstylist did not touch my roots. Instead, she focused on the bottom of my hair, lightening and toning it to become more uniform and cohesive. While she did an amazing job, it is natural for lightened hair to get brassy and orange-y over time. As you can see in the picture below, my hair was very much two-toned with my very cool-toned roots, and my warmer ends on the bottom.

What I Asked For
Since sharing my gray blending journey on the internet, I have had so many people reach out asking about how I found my hairstylist. She is someone that I had been going to years ago when I was looking to color correct my hair after years of home dye jobs. So I already knew that she was incredibly skilled and talented in advanced color theory.
She also really enjoys doing color corrections and gray blending, which was important to me! I knew that this was going to be a long journey, with lots of hours in someone’s chair, so I wanted them to be enthusiastic about supporting me through the process.
Going in, I was very specific about only a couple of things. The first being, I wanted to honor my natural patterning as much as possible. Second, I did not want to cover or “backtrack” on my grow-out process by dying any of my new growth. Otherwise, I was pretty flexible and trusted her to do what she thought would give me the best experience— both in terms of look and convenience.
The Afters
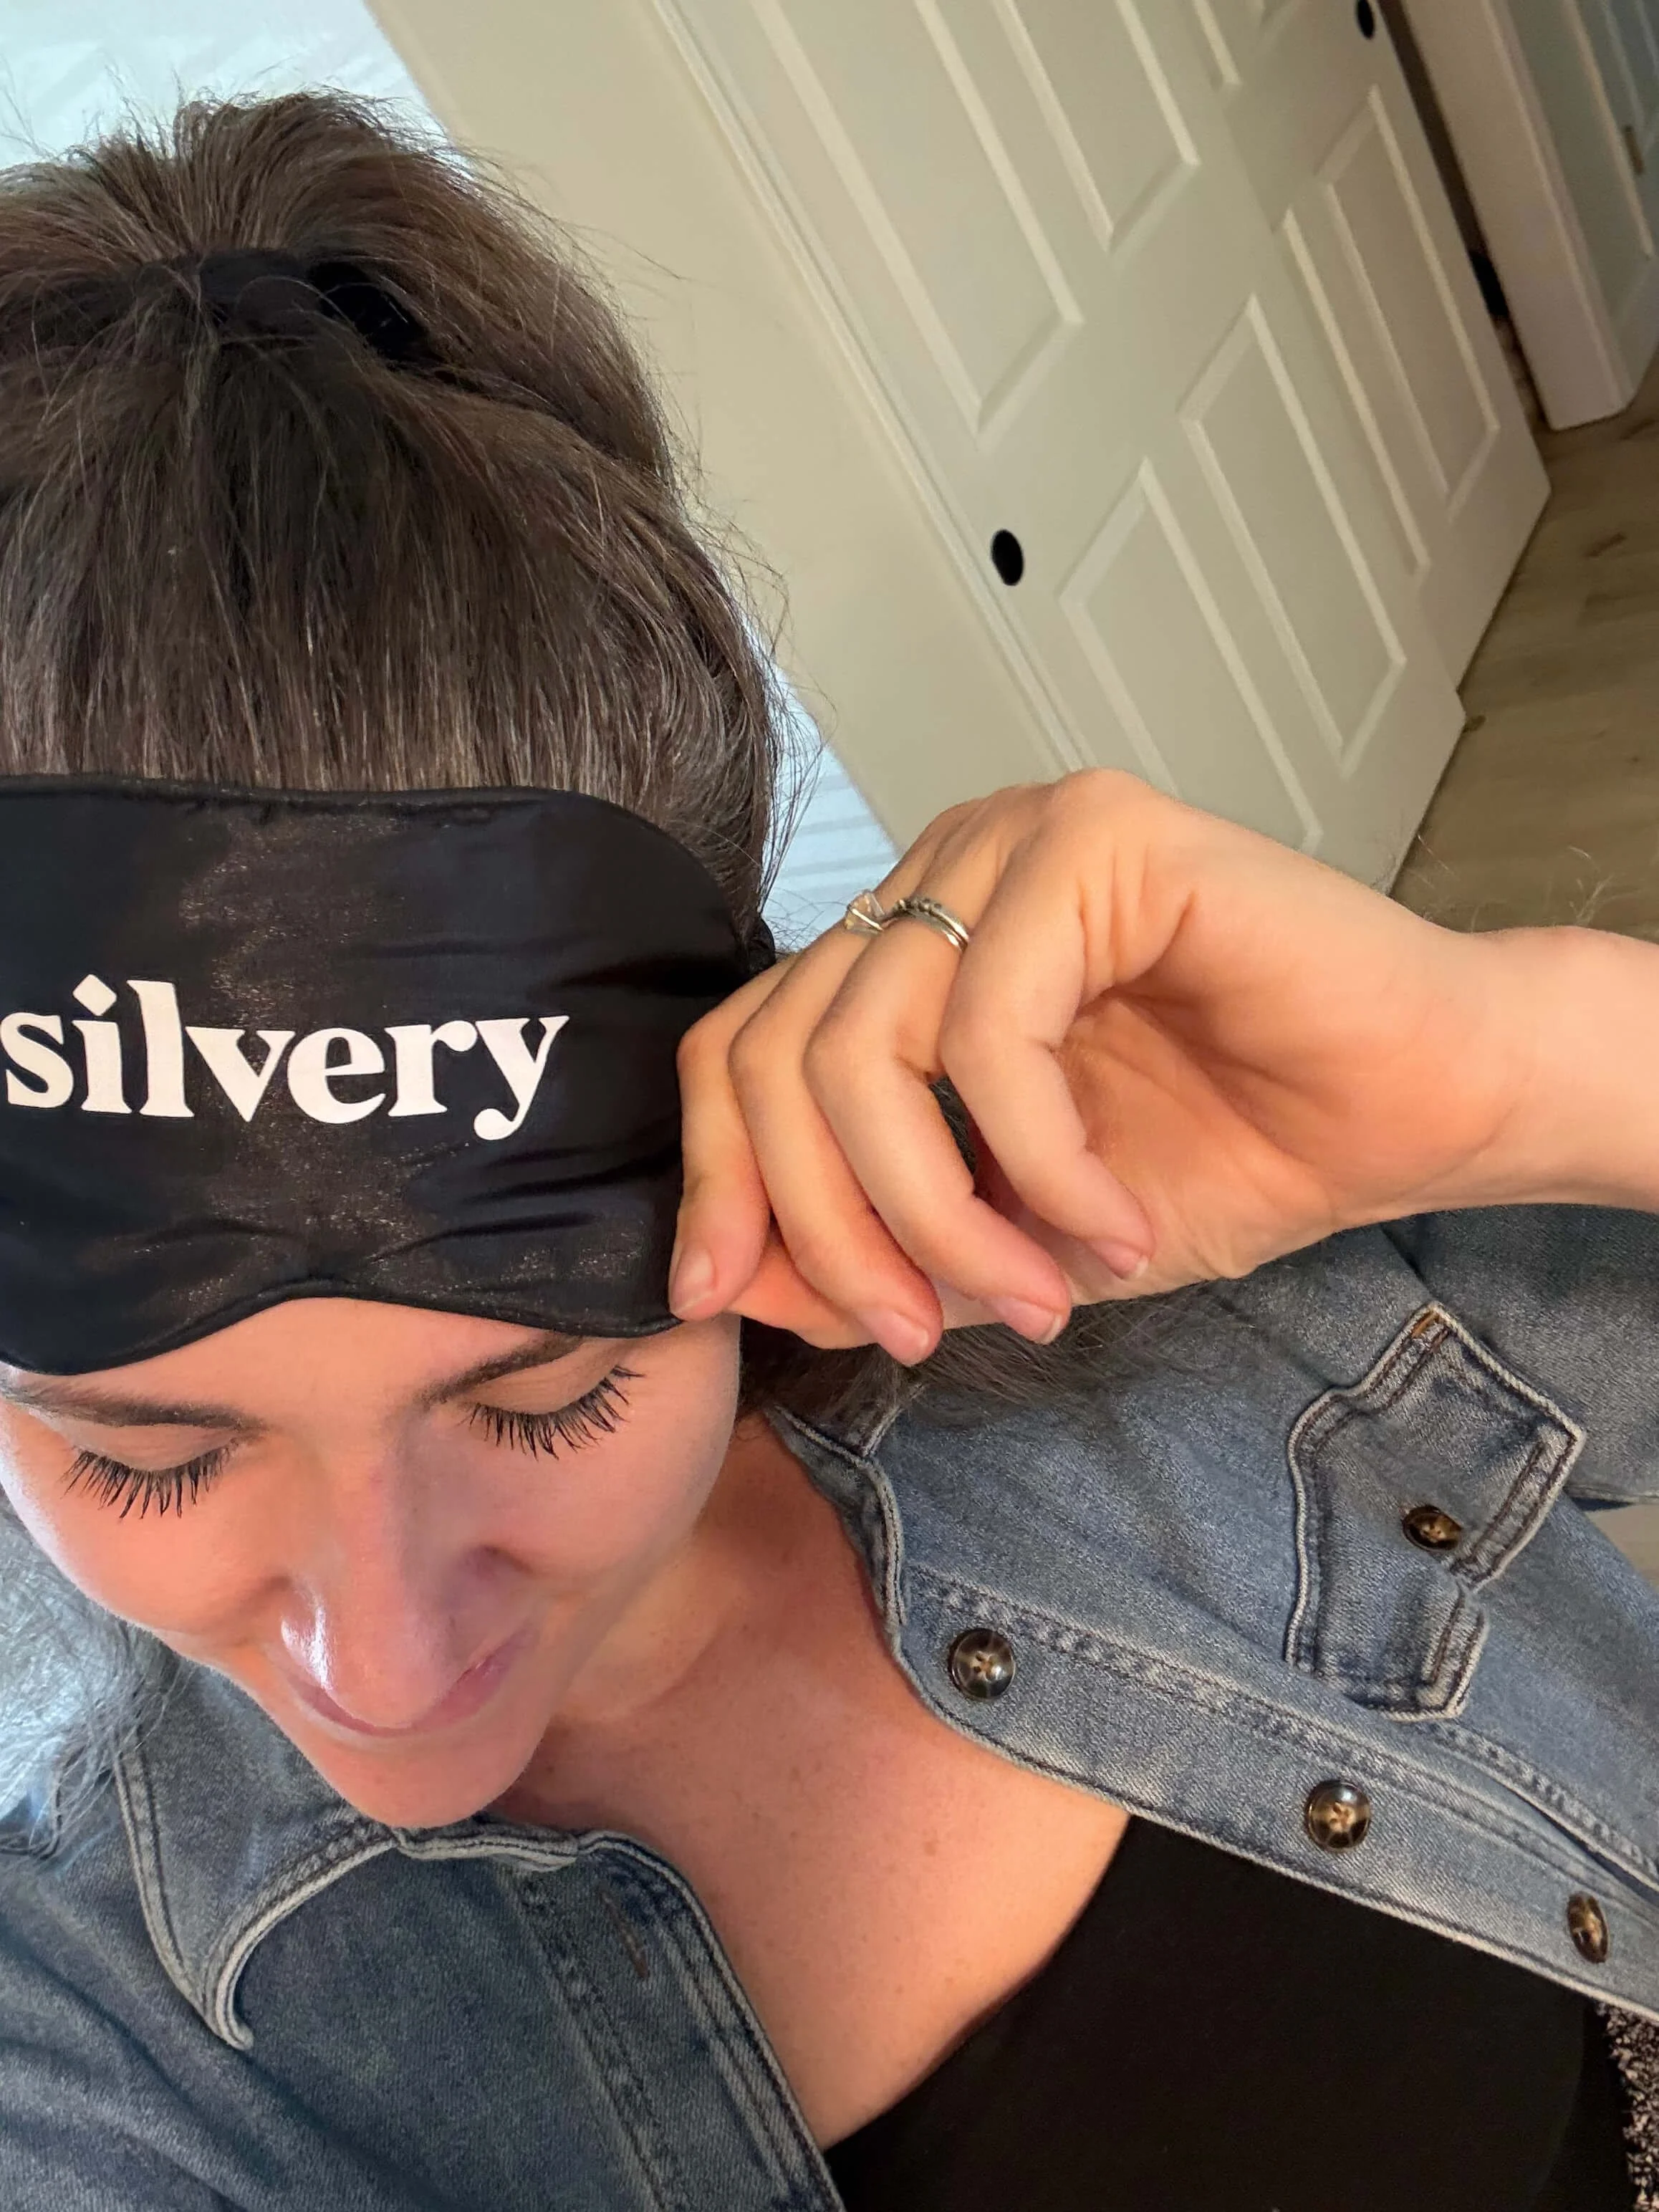
Here are a couple of “after” shots in different lighting (P.S. If you are thinking about growing out your gray hair, you will be SHOCKED over how different it looks in different lights). Sometimes, my hair looks so dark. Other times, I think it is all gray. Totally just depends on the lighting… as you can see below!
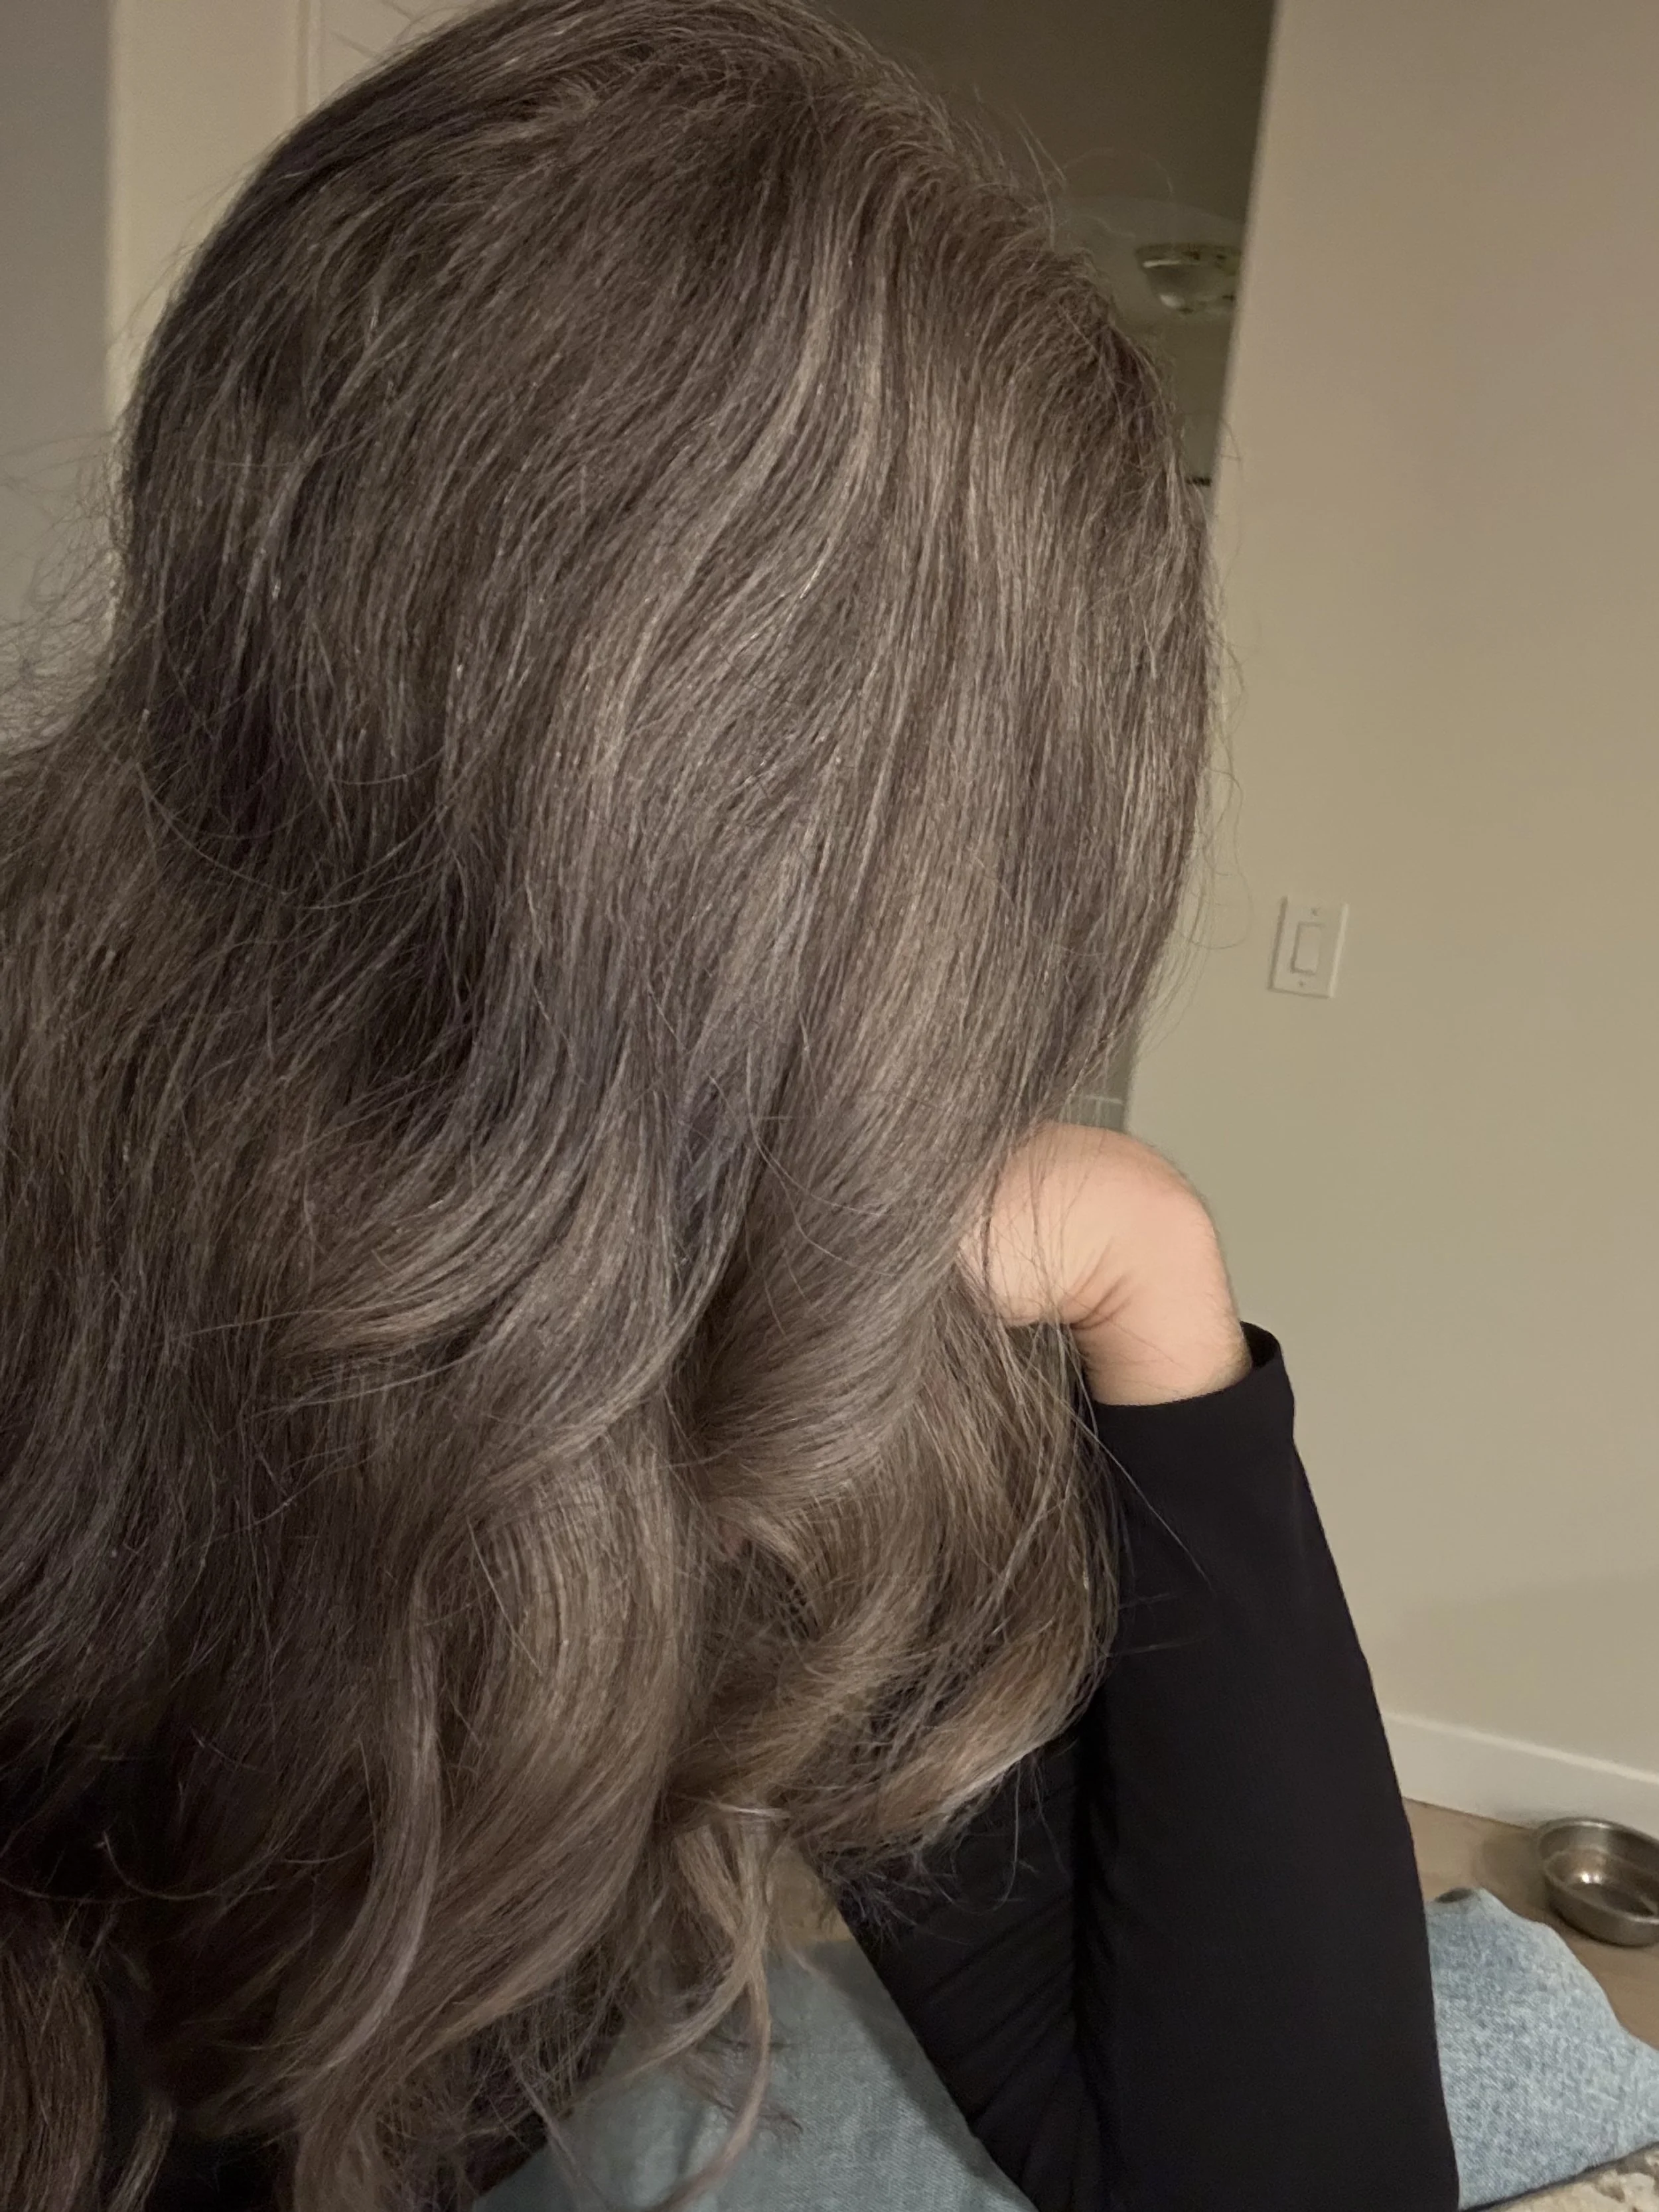
This picture is a great example of how she followed my own unique gray patterning. Depending on how my hair is parted, you can see that my hair is significantly lighter in the front than it is in the back. I LOVE that she really embraced my natural pattern to create a really seamless growout!

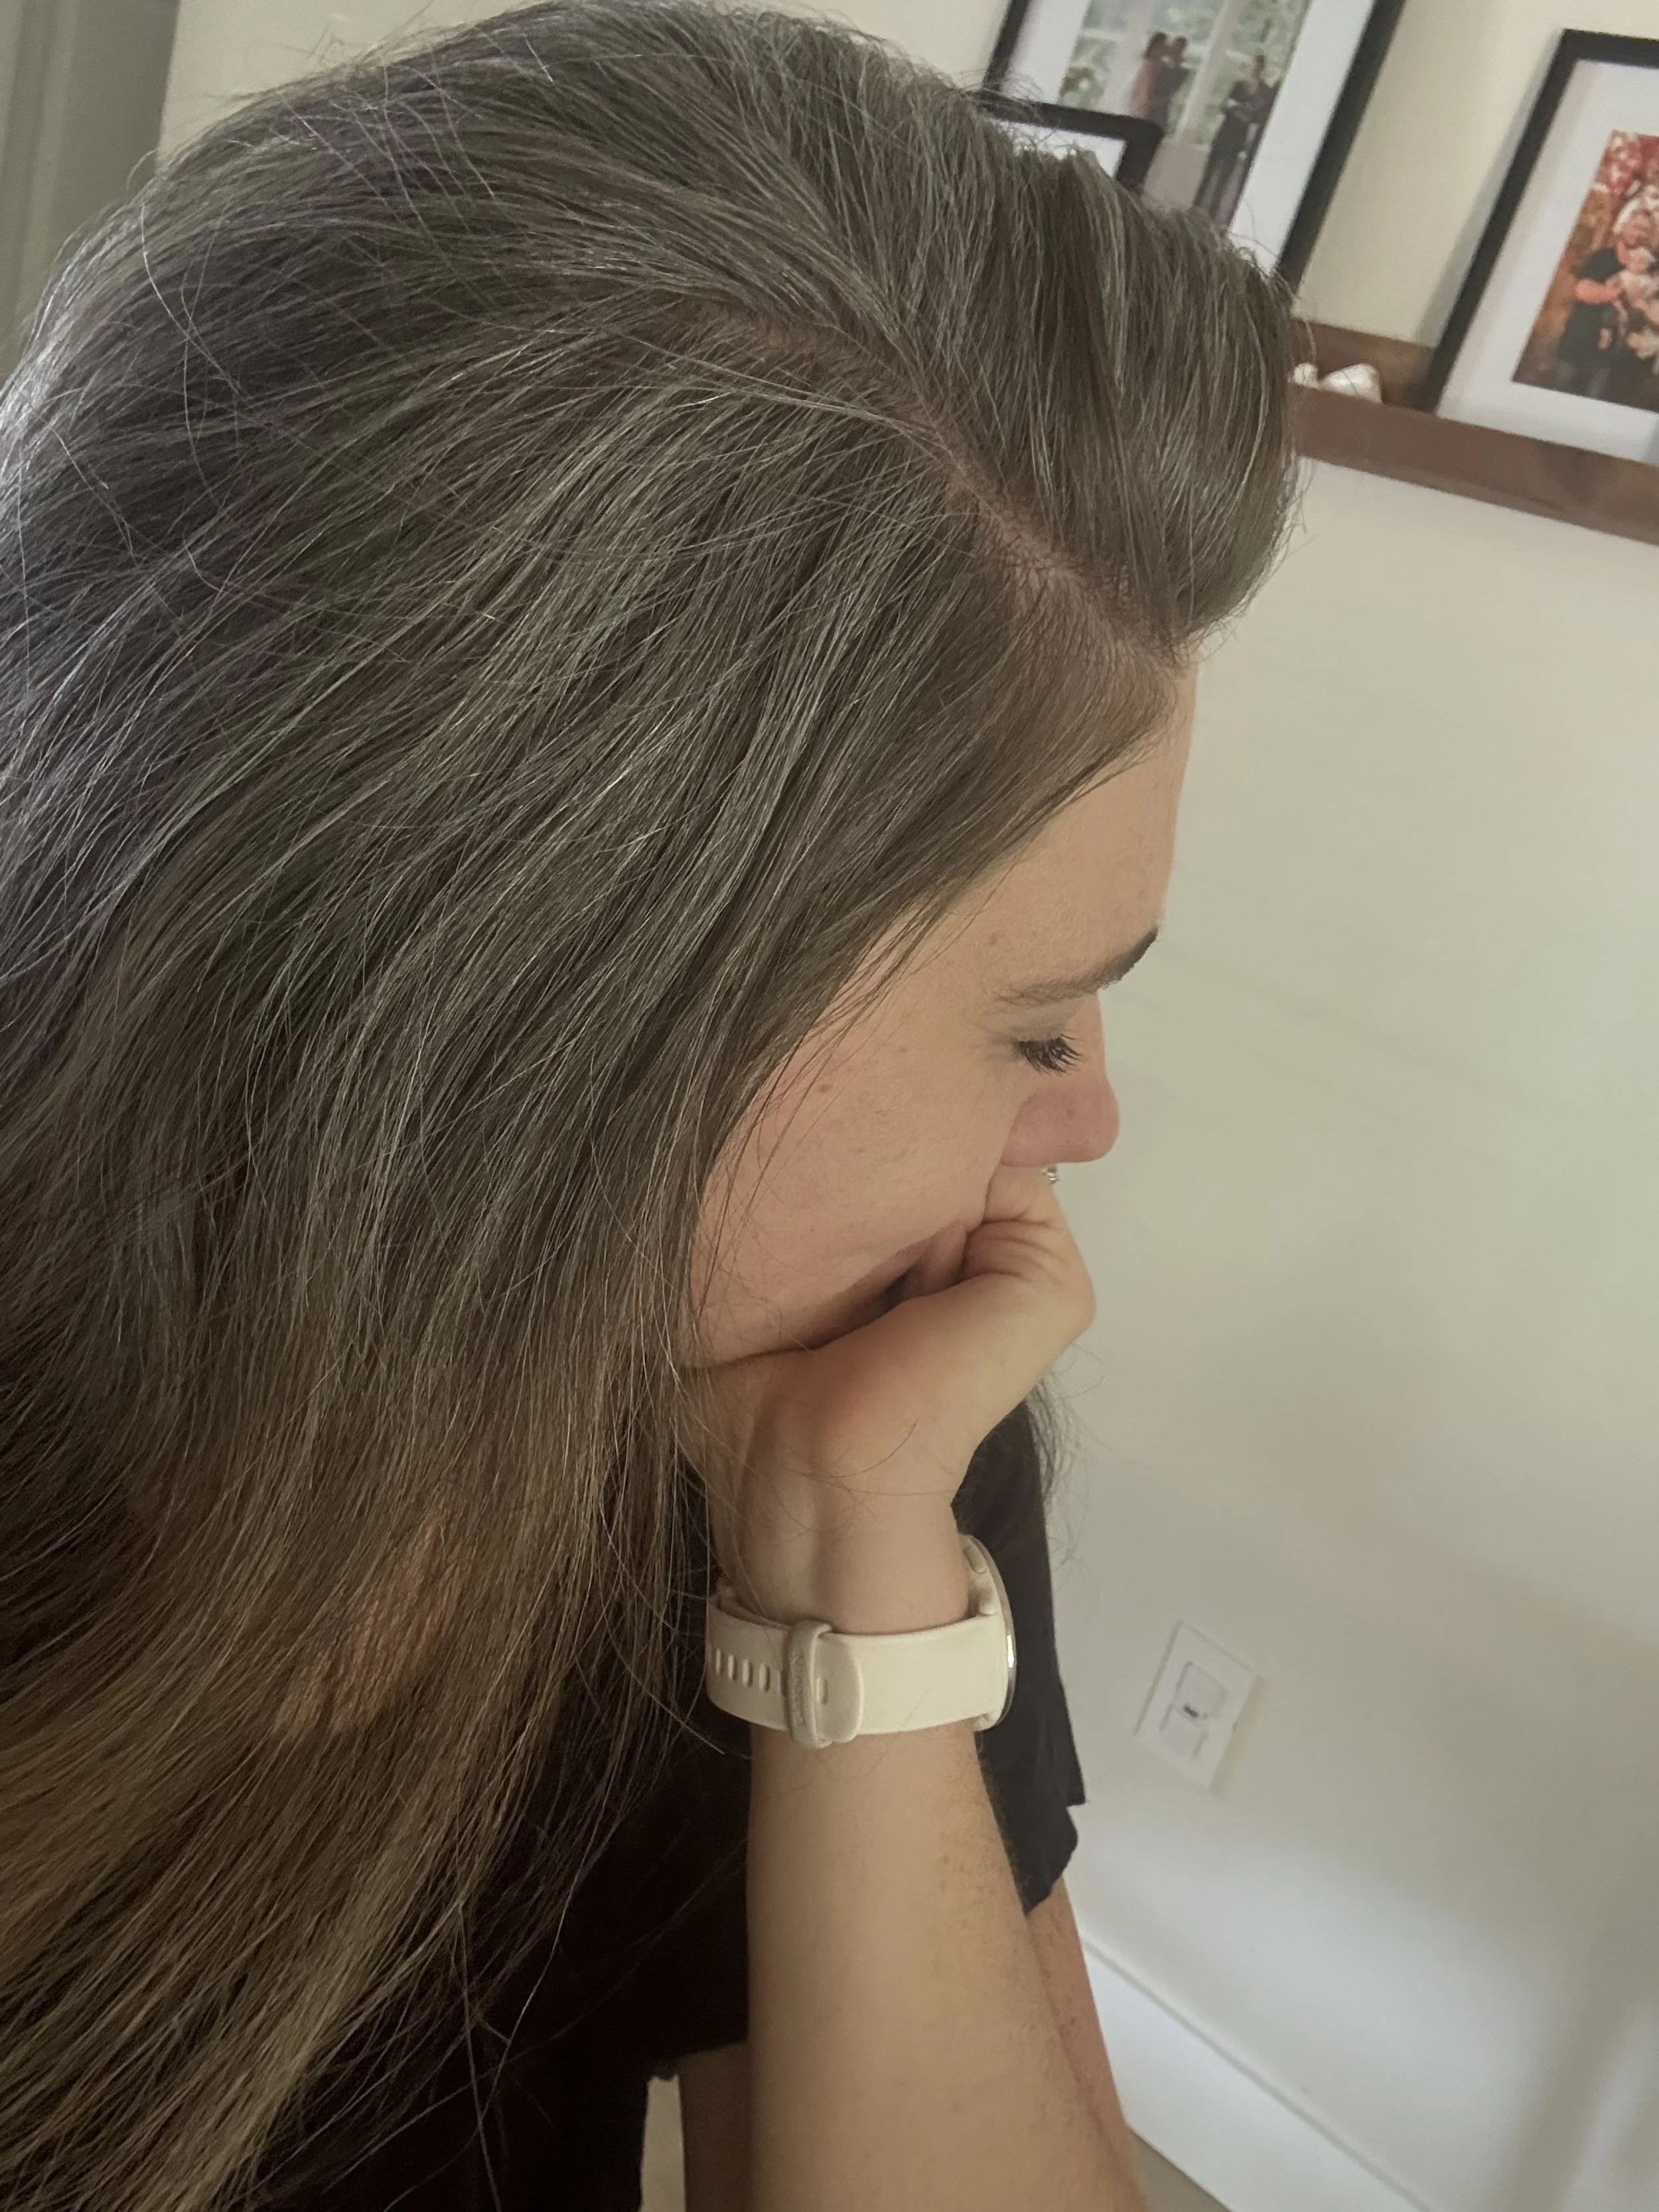
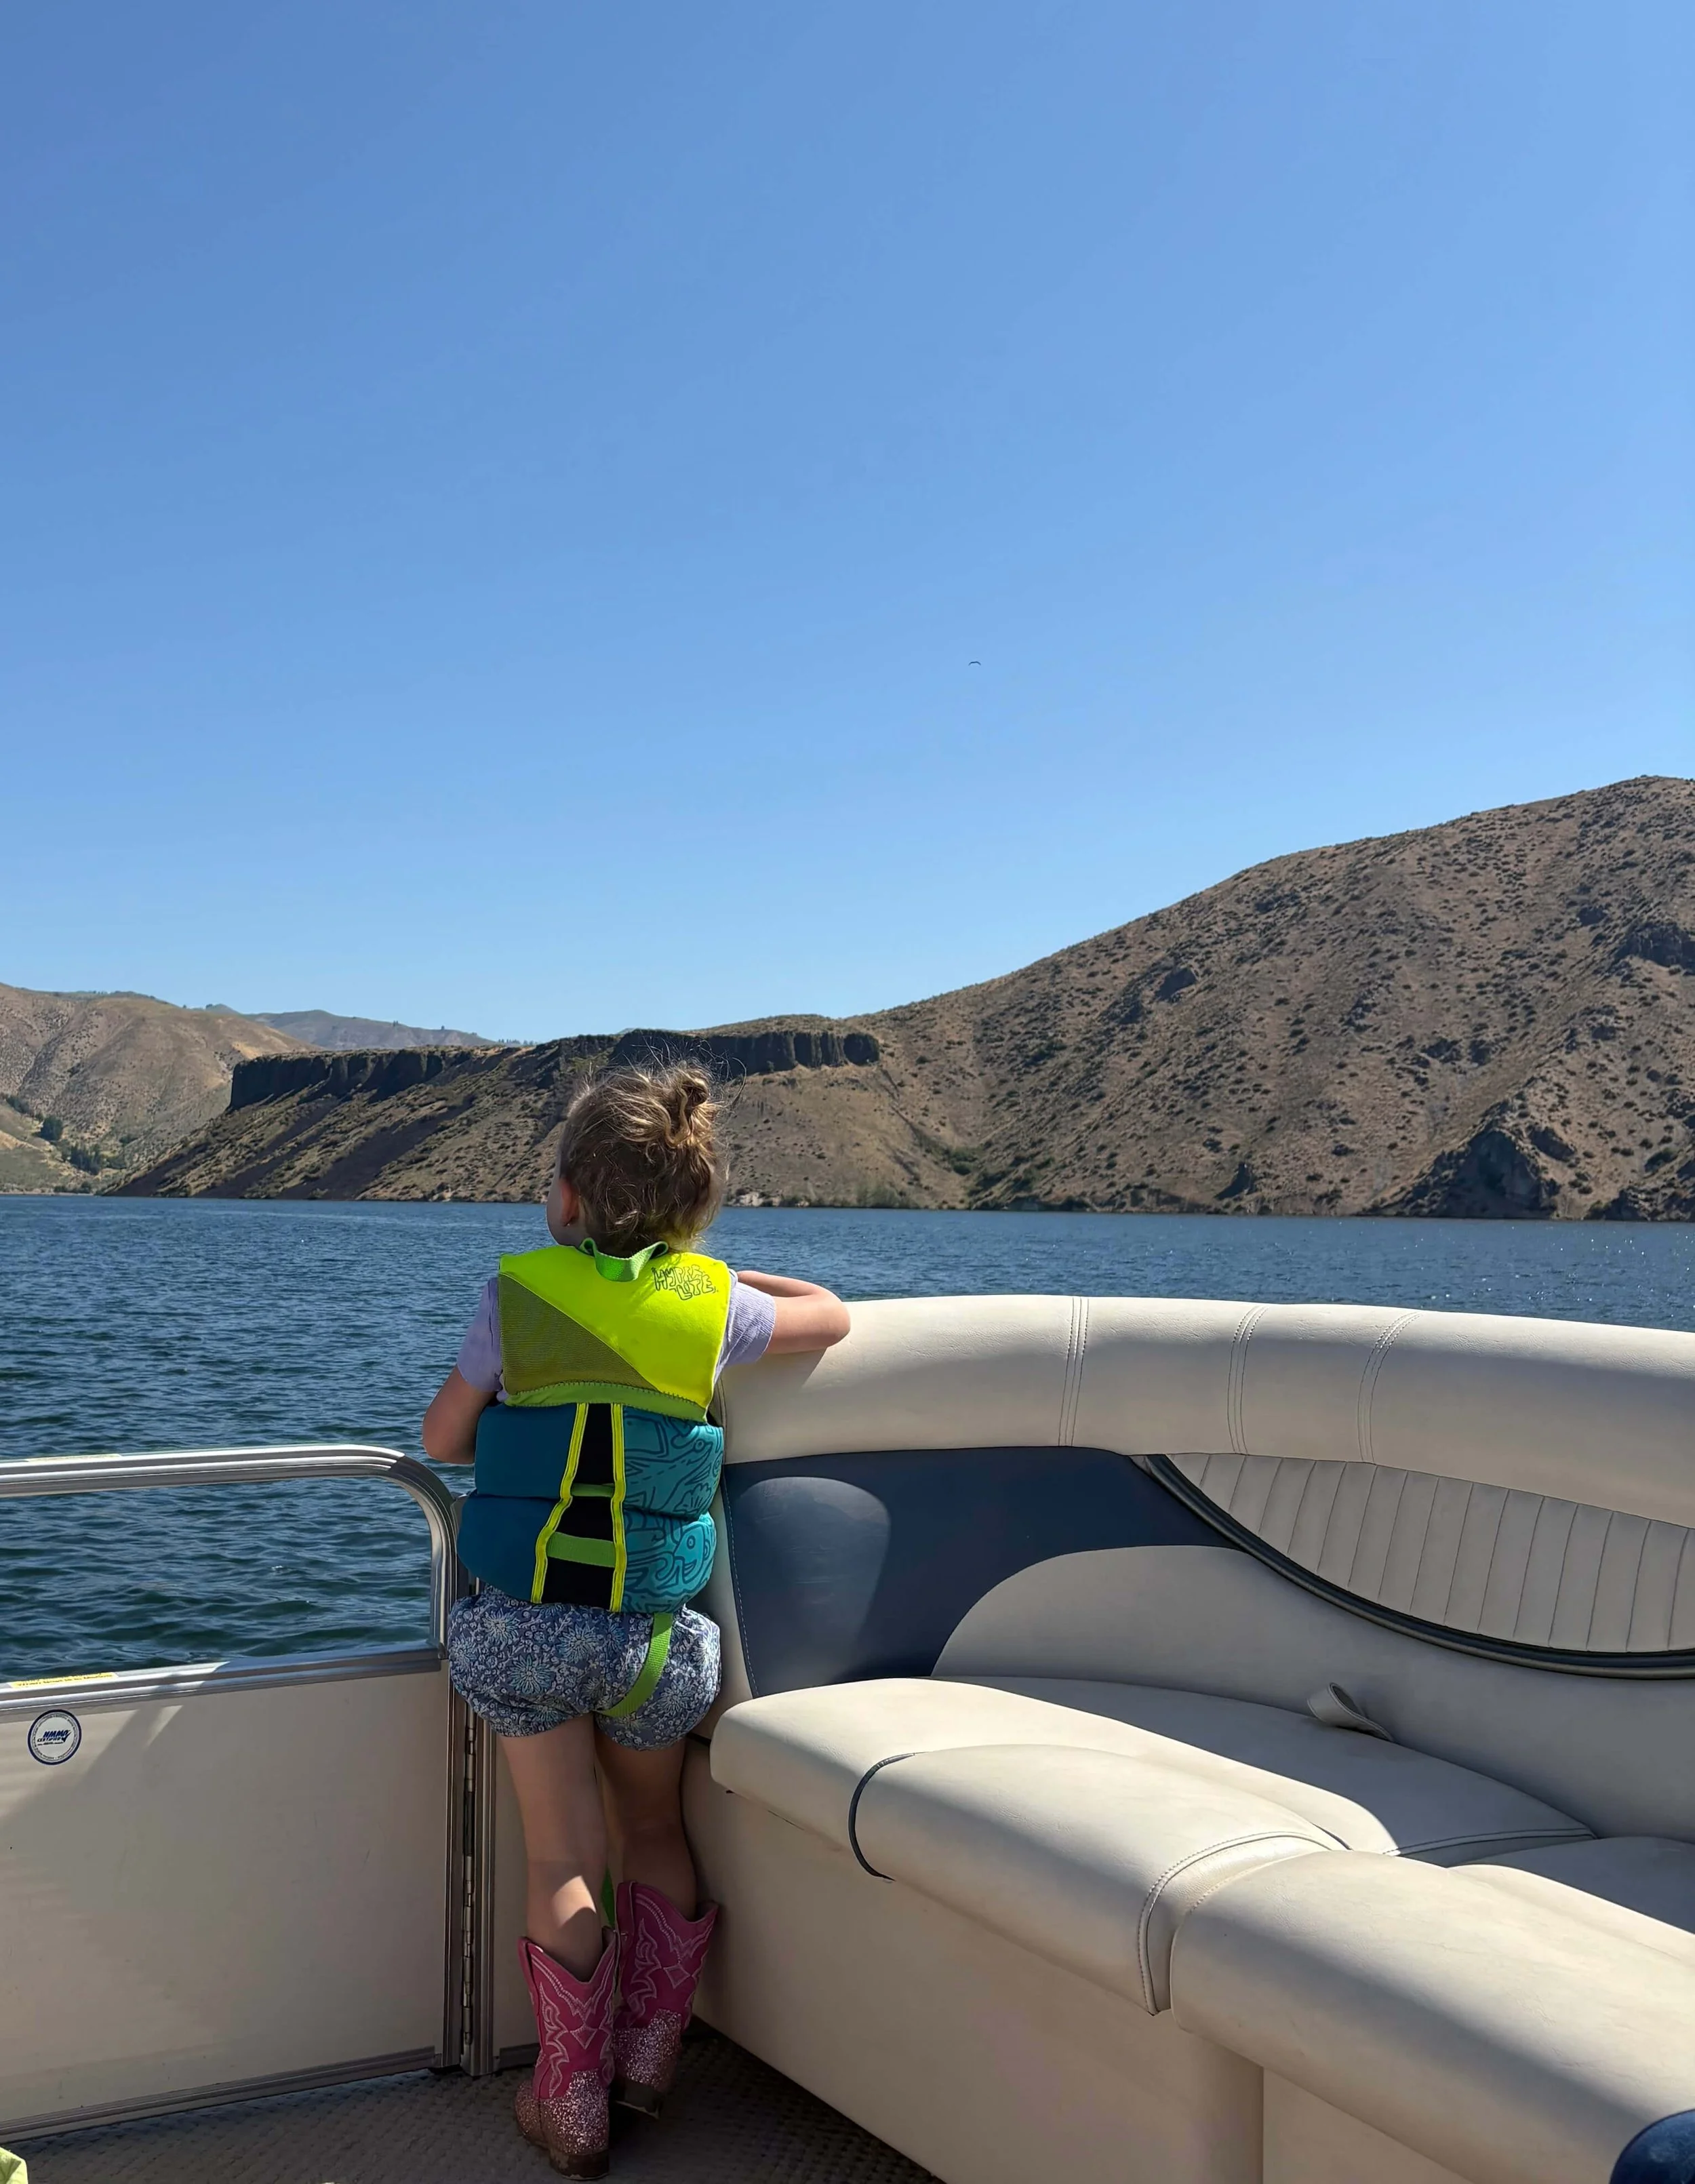
Here is another “after” picture (with a really crazy crop because my silly daughter was in the back and I keep her face off my blog). But you can see in natural light, how much brighter the ends are!
There you have it! A little sneak peek into my gray hair journey and how I am embracing it through each and every stage.. at this point, do I even say I am still in the “grow out” process?? So wild!!
Are you in the grow out process? I would love to hear about your experience!
Kaelyn
More Gray Hair Content


Latest on the blog


Lighter hair is more susceptible to damage from UV rays— but thankfully, protecting them is really easy once you know the right products for the job!